Building a Telegram Bot With Firebase Cloud Functions and Telegraf.js
firebase
telegram
bot
telegraf
Follow @akhromieiev- Introduction
- Prerequisites
- Set up of Cloud Functions
- Install the Telegraf.js
- Set Telegram Token as an environment variable
- Write Telegram bot and function
- Prep work for testing locally
- Set the Cloud Function’s URL as a webhook for Telegram
- Example (video)
- Deploy the function
- Wrapping up
Introduction
In this post, we will create a simple Telegram Echo bot and deploy it to Firebase within a function. We will use Firebase HTTPS Cloud Function as a Webhook for Telegram Bot and will handle all Telegram updates within your function.
Prerequisites
To follow this tutorial you need to have these minimum requirements:
- Node v12.4.0
- NPM v6.9.0
- Telegraf.js v4.0
- Firebase CLI v9.2.0
- Firebase project with Blaze plan. I have already written about how to set Blaze plan on Firebase platform
- Read more about how Telegram handle updates
- You should register your bot with @BotFather Bot and get the token
NOTE: Firebase requires us to set a Blaze plan in order to work with requests to other APIs (outside of Google Services). In this tutorial, we have to communicate with Telegram API within the Firebase Cloud Function. So, it’s important.
Set up of Cloud Functions
We are starting from creating and setting up the Firebase Cloud Functions locally. We need to create a folder and initialize your project using the:
firebase init functions
For this setup, we can choose the default values.
On this step you can select to create or use an existing project:
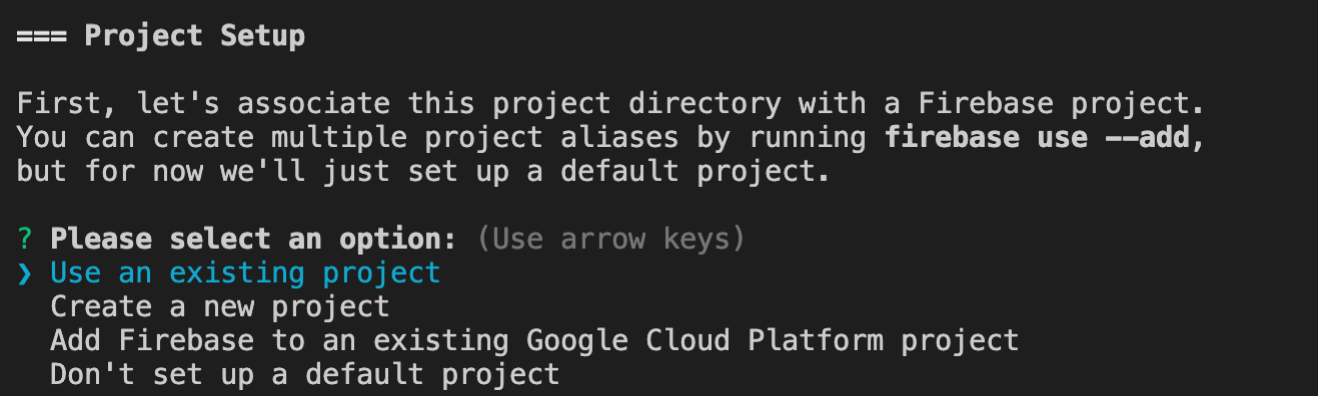
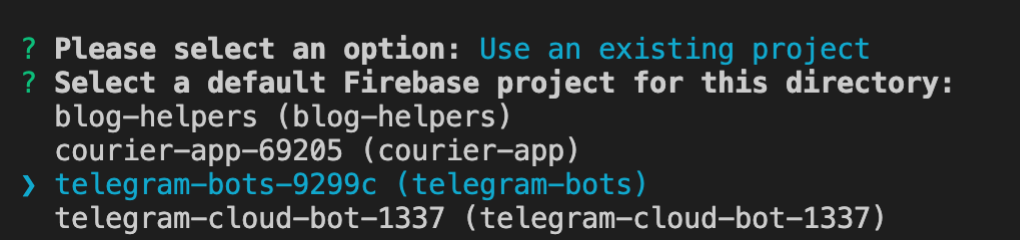
We will go with an existing:
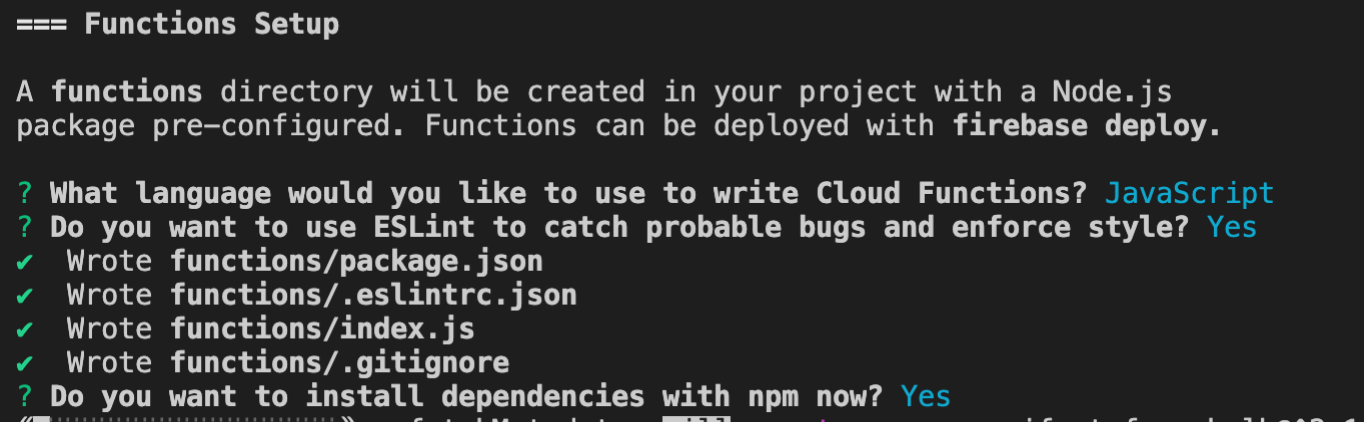
We will use the Javascript as a default language:

Dependencies installation is a final step:
Install the Telegraf.js
To leverage the work with Telegram API, let’s start use the Telegraf.js package. Telegraf.js has a large community of enthusiasts and probably the most powerful Telegram API wrapper for Node.Js. BTW, you can discover other packages on the Telegram official site.
In order to install this library we need to open the functions folder:
cd functions
and use a simple command for installation:
npm install telegraf --save
NOTE: At the time this post was published, v4.0 was the latest version of Telegraf.js
Set Telegram Token as an environment variable
To avoid using the secret key (Telegram token it’s a secret key) within a code we can set up the Telegram token as an environment variable for your Firebase project. Assume, you got the token from the Botfather bot, so we can put this value to Firebase config:
firebase functions:config:set telegram token="<telegram-token-string>"
It looks like this:

Because, through one section we will run the function in Emulator Suite, we have to export Firebase Config value to local runtime configuration. You can do this within the functions folder by running:
firebase functions:config:get > .runtimeconfig.json
Write Telegram bot and function
We will put the following code to functions/index.js:
const functions = require('firebase-functions')
const Telegraf = require('telegraf')

const bot = new Telegraf(functions.config().telegram.token, {
	telegram: { webhookReply: true },
})

// error handling
bot.catch((err, ctx) => {
	functions.logger.error('[Bot] Error', err)
	return ctx.reply(`Ooops, encountered an error for ${ctx.updateType}`, err)
})

// initialize the commands
bot.command('/start', (ctx) => ctx.reply('Hello! Send any message and I will copy it.'))
// copy every message and send to the user
bot.on('message', (ctx) => ctx.telegram.sendCopy(ctx.chat.id, ctx.message))

// handle all telegram updates with HTTPs trigger
exports.echoBot = functions.https.onRequest(async (request, response) => {
	functions.logger.log('Incoming message', request.body)
	return await bot.handleUpdate(request.body, response).then((rv) => {
		// if it's not a request from the telegram, rv will be undefined, but we should respond with 200
		return !rv && response.sendStatus(200)
	})
})
All code before the exports.echoBot line is Echo Bot. The code is pretty straight-forward. We set the Telegram token, then implement a simple error-handler, configure a “start” command and implement the logic of copying the message within the message handler.
Then we implement the echoBot HTTPS trigger function that handles all Telegram updates using the handleUpdate method. We pass only the body property of the request object and response as a second parameter.
In simple words, Telegram will send all updates to your function and the function will respond to these updates using the handleUpdate method of the bot entity. Basically, there is a logic of communicating with Telegram API behind the handleUpdate.
NOTE: Sometimes Google can audit the Firebase Functions and send some data. This data is not an entity of Telegram update, but we need to respond to requests anyway. For this purpose, we can handle this case within
.thenblock (bot.handleUpdatereturns aPromise). If the Telegram update was handled successfully,rvvariable should betrueand we will do nothing. Otherwise,rvwill beundefinedand we will respond withStatus Code: 🟢200
Prep work for testing locally
We can test the bot using the Firebase Emulator. But first of all, we need to create a public tunnel link for your bot. Telegram requires an HTTPS endpoint for the webhook value. The HTTPS trigger function will be it. In this section, we will create a public tunnel for your locally-launched function and set it as a webhook for the Telegram bot. Then we will register the public URL as a webhook for the Telegram Bot.
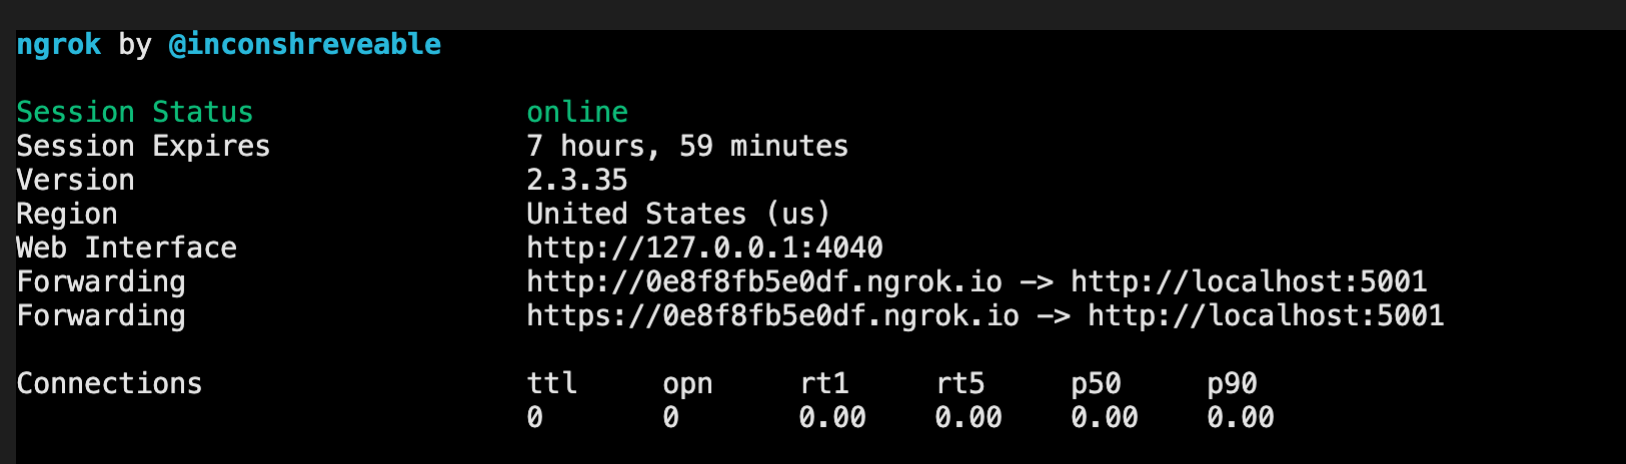
In this tutorial, we will use ngrok as a tool for creating a tunnel. Firebase Emulator runs the function on 5001, so let’s create a public tunnel for this port:
ngrok http 5001
Now we are able to run the emulator using the following:
firebase emulators:start
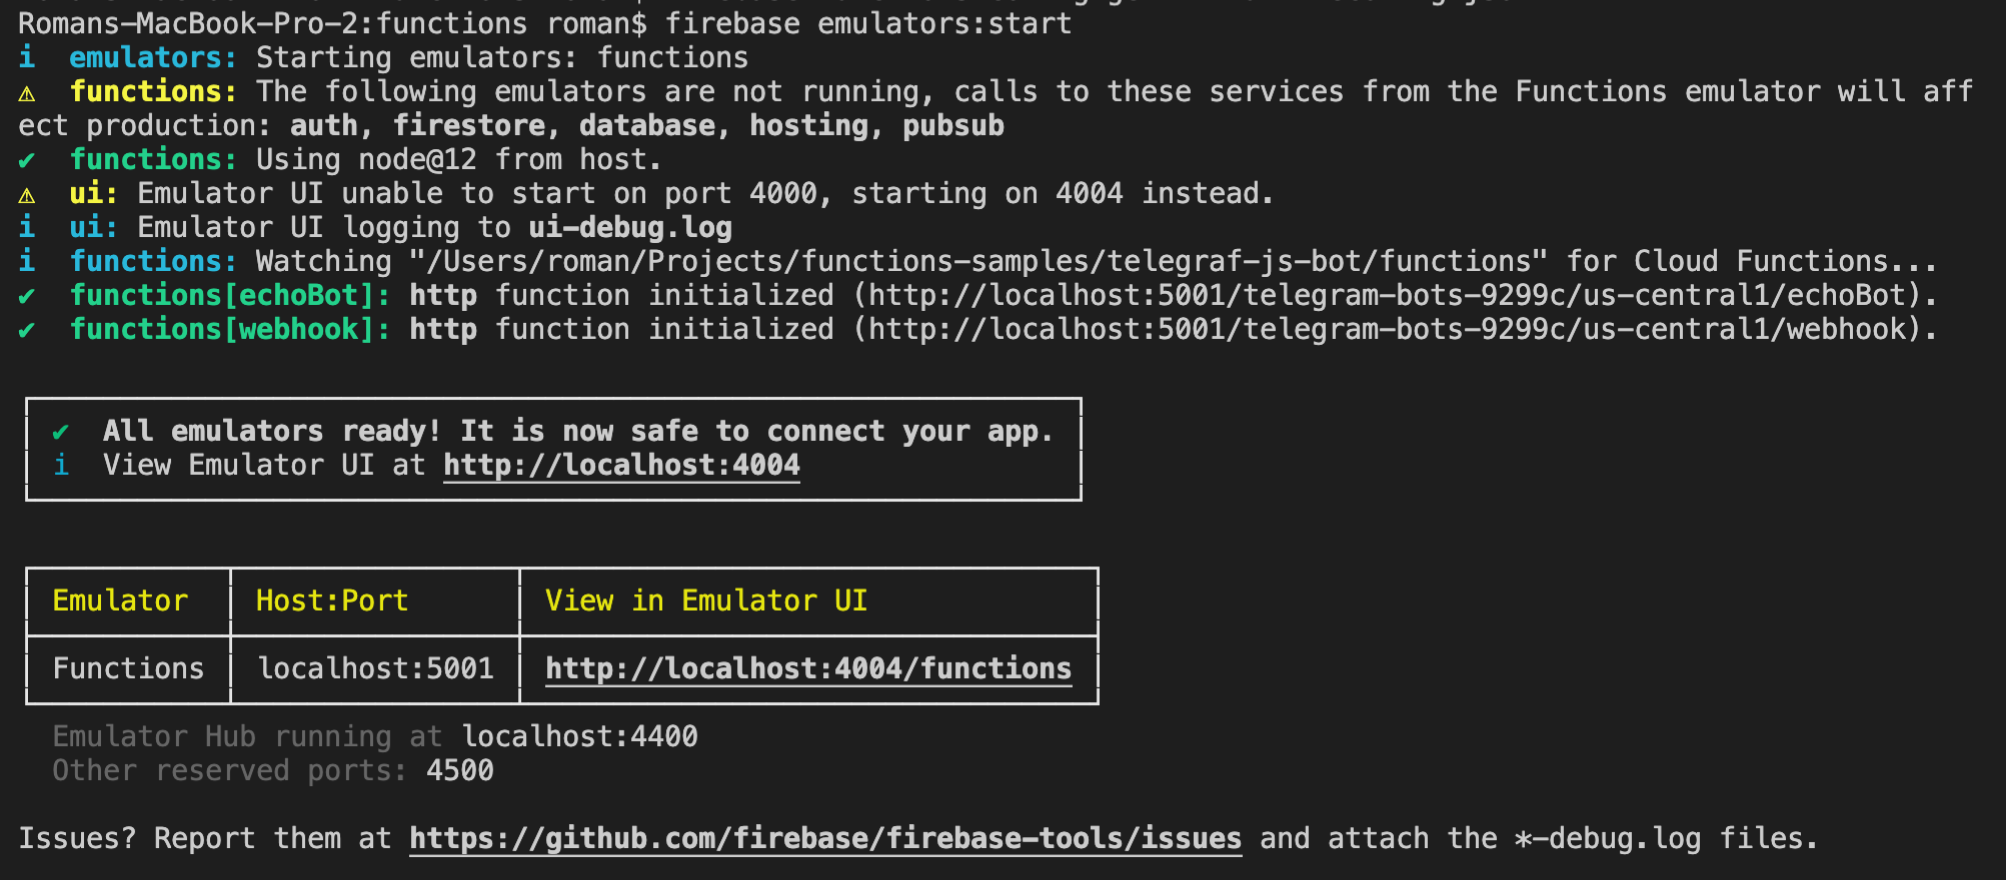
The emulator is accessible in the browser and we can check the logs:

After all these tunings, we can access the function from the outside. The pattern:
<ngrok-link>/<project-id>/<region>/<the-name-of-function>
Set the Cloud Function’s URL as a webhook for Telegram
To run the bot locally, we need this last step - register the webhook. We have done the prep work and already know the public URL, that we can use as a webhook.
To register the webhook, we need to use the setWebhook Telegram API. We have to send the public URL as a query parameter. Use this construction:
https://api.telegram.org/bot<bot-token>/setWebhook?url=<public-link>
You could send a POST request with Postman or cURL:
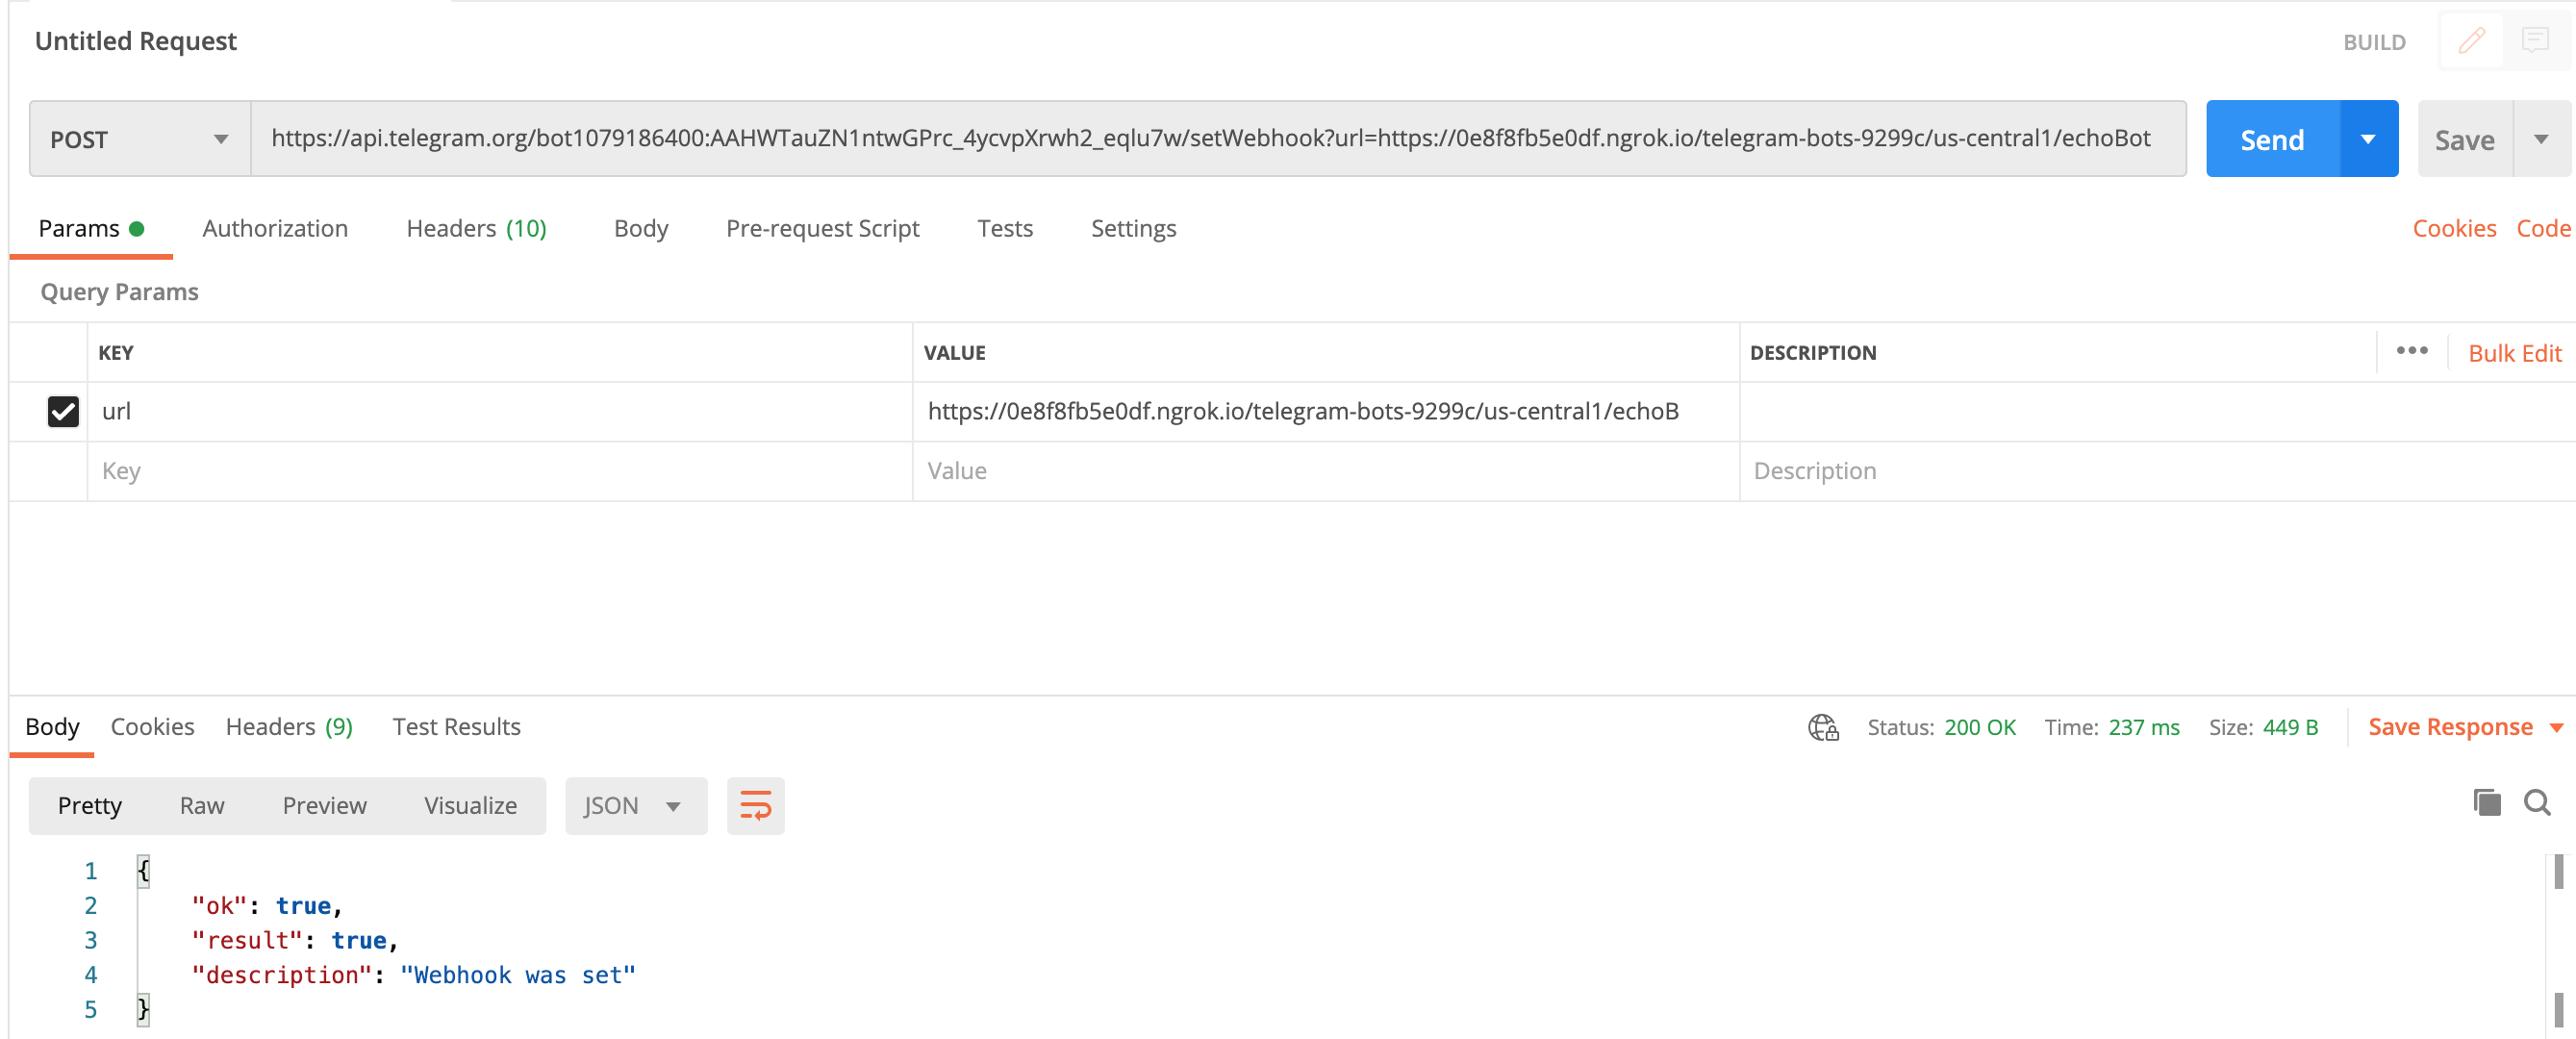

TIP💡: Many Telegram APIs has this pattern:
https://api.telegram.org/bot<bot-token>/<method>.
Telegram API should return a successful message. Now we need to be sure that Emulator is working and we can test the bot.
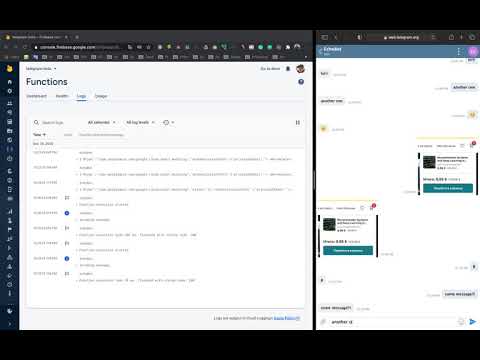
Example (video)
Let’s interact with the bot. Here is a video:

Deploy the function
After running locally we are ready to deploy this function including the bot functionality, scale it somewhere on Firebase servers and share with users :) We need to stop the local bot and we can deploy it within the functions folder:
firebase deploy --only functions
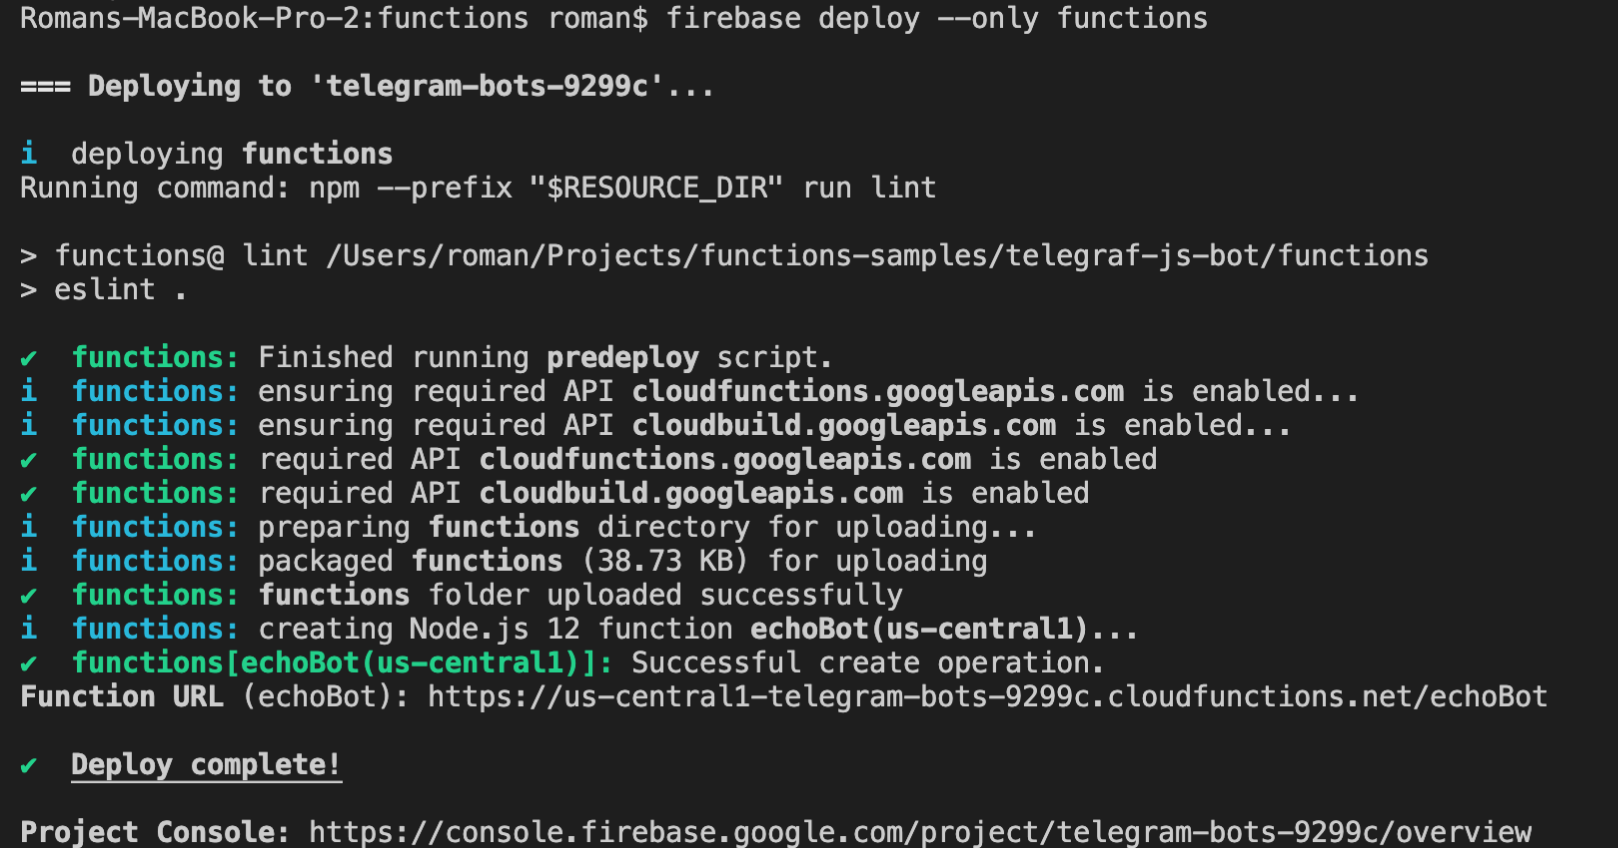
You’ll get the function URL that should be used as a new webhook URL for Telegram (just update a webhook with it). Now, this is a real public link without any tunnels.
BTW, if you open the Firebase portal you could see the deployed function and check some real logs (only after the webhook was set):

Video:
TIP💡: To check an existing Webhook you can use the
getwebhookInfomethod:The response will be similar to:
   {
       "ok": true,
       "result": {
           "url": "https://us-central1-telegram-bots-9299c.cloudfunctions.net/echoBot",
           "has_custom_certificate": false,
           "pending_update_count": 0,
           "max_connections": 40,
           "ip_address": "211.234.33.54"
       }
   }
Wrapping up
That was a lot of information about how to use Firebase HTTP trigger functions to handle Telegram updates and do Bot development. Firebase Cloud Functions could be a cool solution for hosting multiple bots and scale them automatically.
TIP💡: You can add new cloud functions to extend your bot. For example, create your own proxy functions for setting Telegram tokens using the Telegraf.js
comments powered by DisqusTIP💡: Remember, that Firebase Cloud Functions is a part of Google Cloud Platform and if your function requires more resources you are free to configure the memory, maximum instances, and timeout per function.