In this tutorial, I want to show you how to use the Capacitor Share API into your Ionic project and how it will work in IOS app.
Getting started
To follow this tutorial you should have the basic fundamentals of the command line, installed Node, Ionic, Capacitor All the following was done with the next requirements: Node v12.4, Ionic v4.4.0, Capacitor v1.1
New project
In this step, you need to use everything described in this official documentation of Capacitor. To init the project use the following:
ionic start myApp blank --capacitor
We will use the capacitorShareExample as **appName **(also for Ionic project too)** **and **com.roma.capacitorShareExample as appId**. On the step of adding platforms, we will add IOS:
npx cap init capacitorShareExample com.roma.capacitorShareExample
Setup
Let’s go to the project folder and open the src/app/tab1/tab1.page.ts file. We will include Capacitor Share API and ShareOptions interface to this component and create a simple method to share data
Modify src/app/tab1/tab1.page.ts to reflect the following:
import { Component } from '@angular/core';
import { Plugins, ShareOptions } from '@capacitor/core';
const { Share } = Plugins;

@Component({
  selector: 'app-tab1',
  templateUrl: 'tab1.page.html',
  styleUrls: ['tab1.page.scss']
})
export class Tab1Page {
  shareObject: ShareOptions = {};

  constructor() { }
  async share(shareOptions: ShareOptions) {
    await Share.share({
      title: shareOptions.title,
      text: shareOptions.text,
      url: shareOptions.url, dialogTitle:
        shareOptions.dialogTitle
    });
  }
}
We initialized the empty shareObject on line 10**. Share.share** method (line 13) takes an object of **ShareOptions **interface**. **You can check more about in the official Capacitor doc.
Template
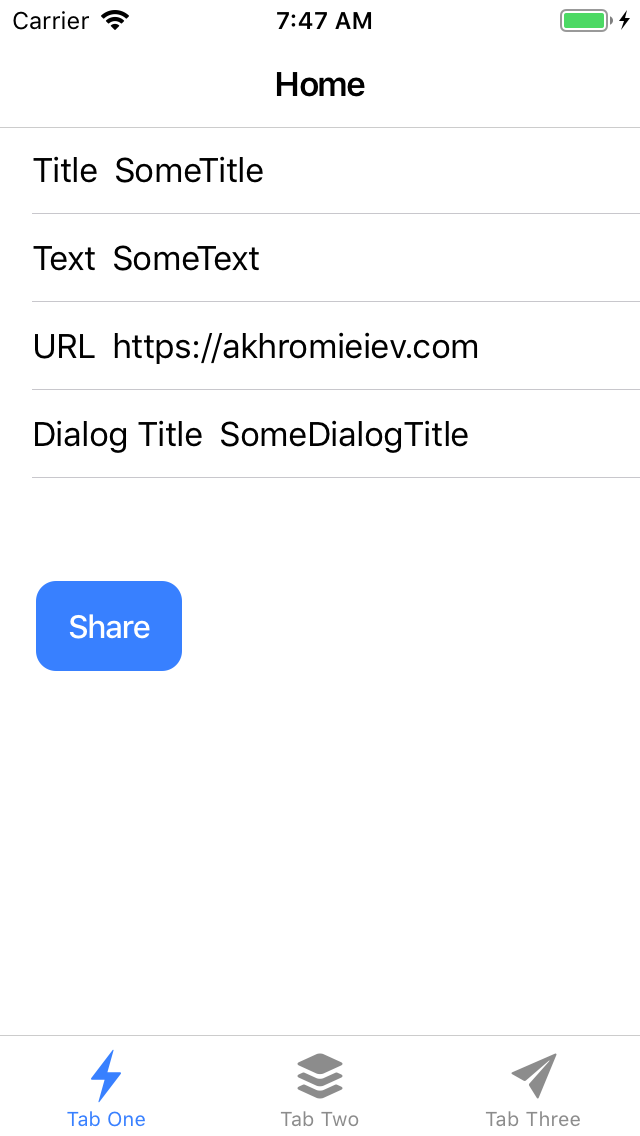
The template will be quite simple. 4 inputs for dialogTitle, text, title, url and 1 button to call **share **method.
Modify src/app/tab1/tab1.page**.html** to reflect the following:
<ion-header>
    <ion-toolbar>
    <ion-title>Home</ion-title>
  </ion-toolbar>
</ion-header>
<ion-content>
  <ion-list>
    <!-- Title -->
    <ion-item>
      <ion-label fixed>Title</ion-label>
      <ion-input type="text" [(ngModel)]="shareObject.title"></ion-input>
    </ion-item> <!-- Text -->
    <ion-item>
      <ion-label fixed>Text</ion-label>
      <ion-input type="text" [(ngModel)]="shareObject.text"></ion-input>
    </ion-item> <!-- URL -->
    <ion-item>
      <ion-label fixed>URL</ion-label>
      <ion-input type="url" [(ngModel)]="shareObject.url"></ion-input>
    </ion-item> <!-- Dialog Title -->
    <ion-item>
      <ion-label fixed>Dialog Title</ion-label>
      <ion-input type="text" [(ngModel)]="shareObject.dialogTitle"></ion-input>
    </ion-item>
  </ion-list>
  <div padding><ion-button color="primary" (click)="share(shareObject)">Share</ion-button></div>
</ion-content>
Results
We will build and run this project on specified platforms (IOS). We can do it using the running the next chain of commands in the terminal:
ionic build && npx cap copy
IOS
To check this project in Xcode we need to run the following:
npx cap add ios && npx cap open ios
Then we will run this project in the Xcode. You should see the next:
After entering some data and clicking on the **Share **button you should see the following:
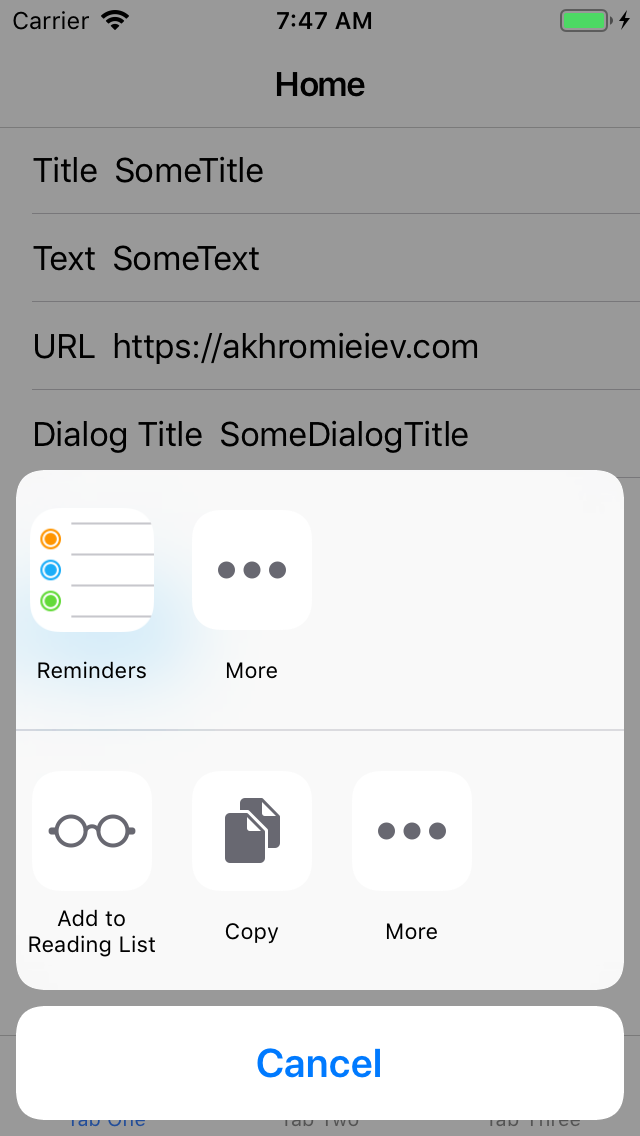
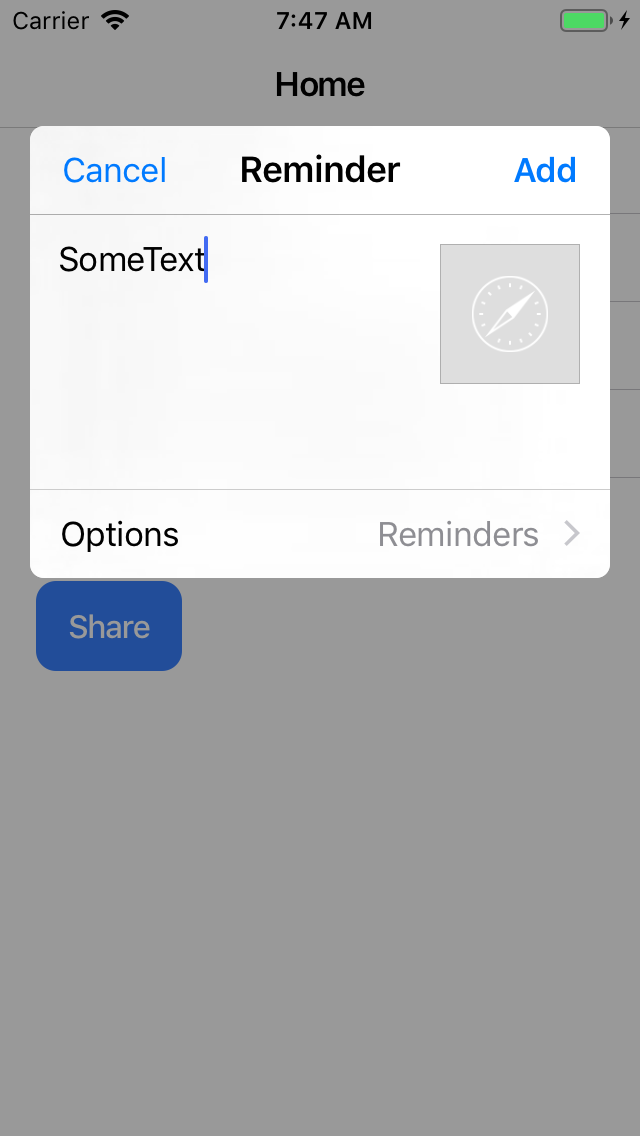
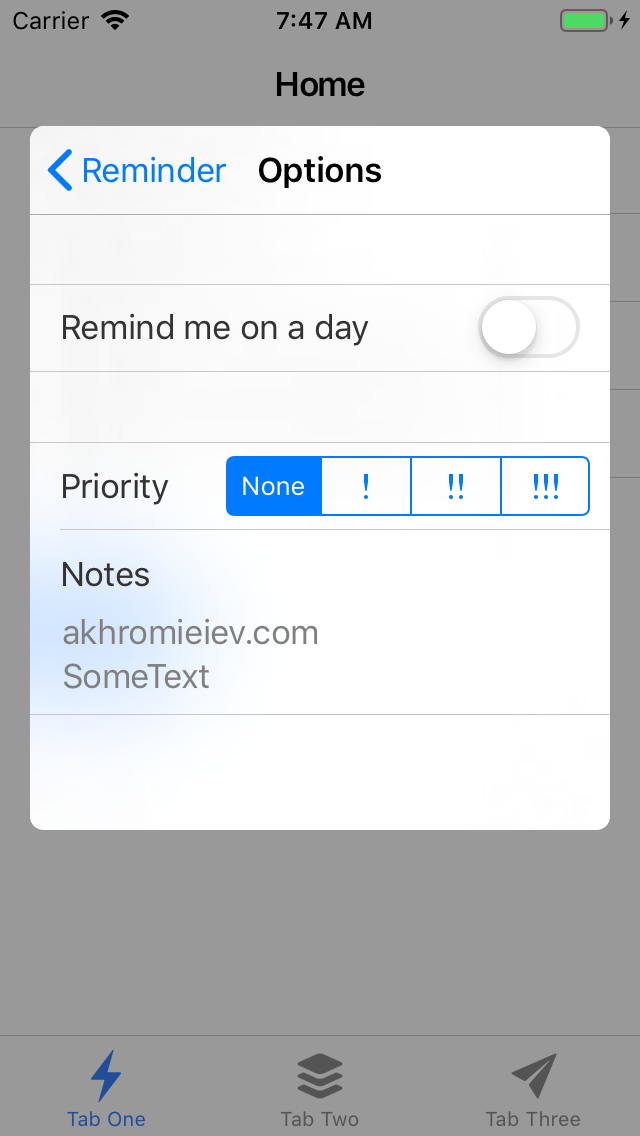
As you can see, the menu is available for sharing. Let’s select “Reminders” and we should see some of our entered data:
Conclusion
It’s very simple to integrate Capacitor Share API into your frontend, Ionic application.
comments powered by Disqus